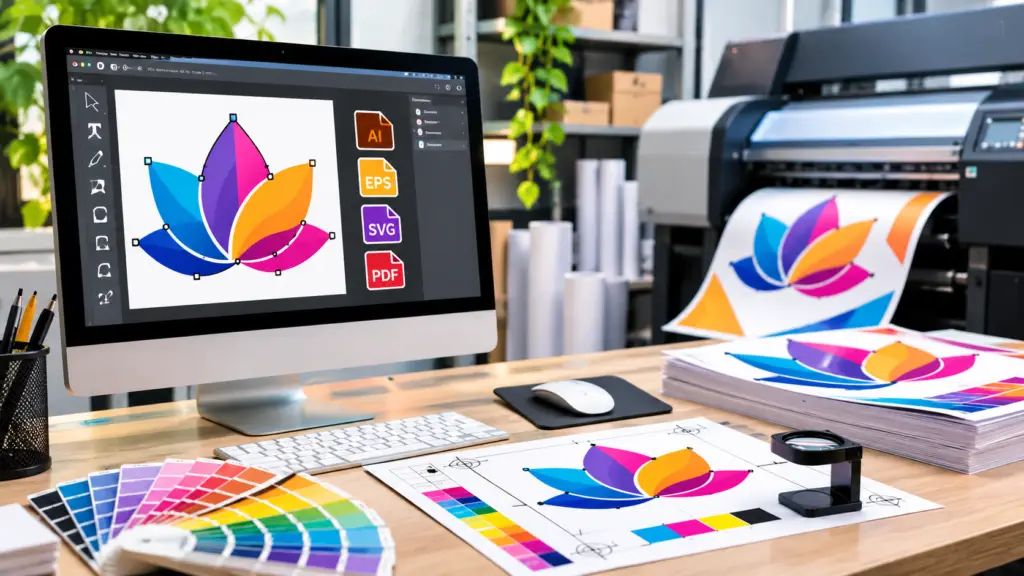
A design can look good on your screen and print well, but that doesn’t guarantee a successful print. The files are the solution to these problems, not the printing. This print-ready artwork guide shows business owners, marketers and designers through the step-by-step process of preparing vector files for professional printing.
Quick answer: To make print-ready files, build or convert your artwork as vectors, set the document to the final print size, use CMYK or the spot colours your printer asks for, convert the text into vector outlines, add a bleed and margin zone, and export the work in a format required by your printer (PDF, EPS, or AI). Always check your printer’s written file specifications before you send anything.
What Makes Artwork “Print-Ready”?
Print-ready artwork is a file your printer can send to production without fixing anything. It has the right size, colours, fonts, bleed, and format for the job.
Vector artwork is the ideal choice when creating logos, floor plans, and images. Vector art is made of shapes and lines rather than pixels, thus making it look sharp regardless of the size.
Example: a logo that has been saved in a small JPG format may be suitable for use on a website but may appear blurry or jagged on a large sign. In contrast, the same logo saved in the vector format will provide an excellent result in any size.
If you only have a low-resolution image, it may need to be redrawn as a vector first. Our print ready vector artwork service can help.
Vector File Formats and When to Use Each
Different vector file formats suit different jobs. Here is a simple guide:
| Format | Best for | Things to note |
| Most commercial printing | The format many printers prefer can keep vectors, fonts and bleed. | |
| AI | Editable Adobe Illustrator source files | Best for printers who work in Illustrator |
| EPS | Older print workflows, sign and promo shops | Widely accepted, but some modern features may not carry over |
| SVG | Web, cutting machines, some vinyl and laser work | Less common for offset printing |
| DXF | CNC, laser cutting and engraving | Used for cutting paths, not colour printing |
Useful check: Ask your printer which format they want before you export. When in doubt, send a print PDF and keep your editable AI or EPS file ready.
For a detailed comparison of each format, read our guide to the best file formats for vector graphics.
Need a different format? See our image to AI and EPS conversion service.
How to Prepare Vector Artwork Step by Step
- Follow these steps for clean vector artwork preparation:
- Get the printer’s specs: request the final dimensions, bleed, colour mode, file type, and any spot colours needed.
- Start with true vectors: ensure that logos and graphics are vector paths instead of images pasted in place. If you only have a raster image, convert it first using a raster to vector conversion service.
- Set the document size: generate the work area according to the final trim size.
- Add bleed and a safe margin: ensure good images and colours of the back running over the trim line, and ensure that crucial text is included in the safe area.
- Set the colours: MNxture CMYK for process printing or indeed specific Pantone colours as required by your printer.
- Convert text to outlines: preventing font changing in case your printer does not have the required typeface.
- Clean up the file: remove hidden layers, stray points, and unused colours.
- Export: convert it into the required file type monitoring that you specify (e.g., print a PDF with bleed and crop marks if required).
Example: When it comes to adopting a regular business card in the US, the preferred measurements of the artboard should be 3.5 x 2 inches, ensuring all sides have been adhered to the requirements of the printing company.
Resolution, Colour, Fonts and Size: What to Check
| Check | What to do | Why it matters |
| Resolution | Vectors have no resolution limit. Any photos placed inside should be high resolution at the final size, often 300 ppi | Low-resolution photos print blurry even inside a vector file |
| Colour mode | Use CMYK for full colour print, or spot colours if requested | RGB colours can shift when printed. |
| Spot colours | Use the exact Pantone codes your brand or printer specifies | Keeps brand colours consistent across jobs |
| Black | Ask your printer about rich black for large areas | Plain black can look washed out on big backgrounds |
| Fonts | Convert to outlines or embed them in the PDF | Prevents missing or swapped fonts |
| Dimensions | Match the artboard to the final trim size | Avoids stretching, cropping or scaling errors |
| Bleed | Extend artwork past the trim by the amount your printer asks for. | Prevents thin white edges after cutting |
Colours on screen and in print never match exactly. For brand-critical work, ask for a printed proof.
Common Export and Production Problems (and Fixes)
| Problem | Likely cause | Fix |
| Blurry logo | Raster image placed in the file | Redraw or convert it to true vector paths |
| Wrong colours | File set to RGB | Convert to CMYK or the requested spot colours |
| Missing or changed fonts | Fonts not outlined or embedded | Outline text or embed fonts in the PDF |
| White edges after trimming | No bleed | Extend backgrounds past the trim line |
| Text cut off | Text too close to the edge | Keep it inside the safe margin |
| Thin lines disappear | Strokes are too fine to print | Use thicker lines as your printer advises |
| Unexpected shapes or gaps | Stray points or overlapping paths | Clean up and merge paths before export |
Example: In the practices of T-shirt printing, a logo may not be accepted by the printer in the event that the logo contains numerous small unwanted points. Thus, it will be better to remove unnecessary points beforehand. Learn more about our T-shirt vector design service.
Preflight Checklist by Print Type
Before sending your file, run a quick preflight check. Needs vary by output:
| Output | Extra checks |
| Business cards, flyers, brochures | Bleed, safe margin, CMYK, outlined fonts, crop marks if requested |
| Signs and banners | Correct scale, enough bleed or hem allowance as your printer specifies, high-resolution photos at final size |
| Screen printing (T-shirts) | Limited spot colors, separated color layers, no tiny details or gradients unless approved |
| Embroidery | Simplified shapes and bold lines; the file will be digitised for stitching. See our guide to vector files for embroidery |
| Laser cutting and engraving | Single clean paths, correct stroke settings, no overlapping lines |
Printing on mugs, pens, bags or other merchandise? See our guide to vector artwork for promotional products printing.
Final check for every job:
- File opens correctly and matches the printer’s specs
- Text must either be converted or embedded
- There must not be any extra layers or any visible objects.
- A low-resolution preview is attached for reference
Common Mistakes to Avoid
- Assuming any file is a vector: JPEG images are also regarded as pixel-based images, not vectors.
- Using auto-trace without review: Quick auto-tracing creates messy paths and rough edges. Review it carefully, or have it redone. See our manual vectorization vs auto-tracing quality comparison.
- Sending RGB files: Colour changes may occur during the print process.
- Forgetting bleed: This tends to be the most common reason why files are returned.
- Leaving fonts live: Fonts may not be available in printing.
- Skipping the proof: Always check printer evidence before approving a job.
- Guessing the specs: Make sure to find out about size, colour, bleed, and file format in writing from the printer.
FAQs
What should I know first about print-ready vector files?
Although all vector images can be scaled to any size, they still need to be the correct size, colour, font, bleed, and file type for successful printing.
How do I choose the right file format?
Ask your printer. A print-ready PDF suits most works; AI or EPS suits editable work, and SVG or DXF suits cutting and engraving.
Which specifications or quality checks matter most?
Size of the final product, bleed, safety margin, colour mode, font outline, clean paths and the printer’s requested format.
What preparation does a print file need?
All text must be converted to outlines; make the right choice of colours (CMYK or Spot); add bleed; remove stray points; and export to the printer’s specs.
Conclusion
Knowing how to prepare vector files for professional printing saves time, money, and reprints. Start with true vectors, match the final size, use the right colours, outline your fonts, add bleed, and export in the format your printer asks for. A quick preflight check before you send the file catches most problems early.
Have a logo or image that is not print-ready yet? Send it to Vector.Center for professional vector conversion, or contact us for a quote.